If you’re a parent, teacher, or toy maker looking for a durable, tactile learning tool, alphabet wooden blocks are such a win—they’re classic, timeless, and way more engaging than a tablet for little hands. As a wooden blocks supplier, I’ve helped dozens of small woodworking shops and home crafters turn plain lumber into these beloved educational staples, and let me tell you, it’s not as complicated as it sounds. You don’t need fancy tools or a woodworking degree to pull it off—just a little know-how, some care for safety, and a side of patience. Here’s how to do it right. Wooden Blocks
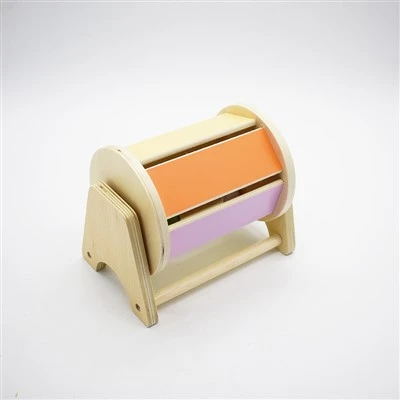
First, let’s start with picking the right base blocks. This is where a lot of new folks mess up: cheap pine or soft plywood sounds easy, but it splinters like crazy after a few toddler drops, and the ink for the letters wears off in weeks. I always recommend solid hardwood, preferably maple, birch, or beech. These woods are dense enough to handle rough play, but soft enough to cut and sand without tearing. Size matters too—for little kids, skip anything smaller than 1.5 inches square. A smaller block is a choking hazard, and big enough letters don’t get lost under couches as easily. If you’re buying pre-cut blanks (which most people do, unless you have a table saw at home), make sure they’re milled smooth on all sides, no sharp edges, and free of knots or cracks. Knots look cute, but they can loosen over time and break apart.
Next, prep the blocks so your letters stick and don’t chip. Sanding is non-negotiable here. Grab 120-grit sandpaper first to knock down any rough spots, then switch to 220-grit for a super smooth finish. Wipe off every last bit of dust with a tack cloth or a damp microfiber rag—dust under your lettering will make it bubble or peel later. Pro tip: if you notice any tiny splinters after sanding, run the sandpaper over them one more time; even a micro-splinters can get stuck in a kid’s finger.
Now, the fun part: adding the letters. You have a couple of options, depending on how much time and money you want to spend. The fastest and most budget-friendly way is to use high-quality acrylic paint or permanent, water-based wood ink. Avoid regular craft paint—it chips and fades within a month. I like water-based ink because it dries fast, doesn’t smell, and is non-toxic, which is a must for anything kids put in their mouths. If you’re using a brush, use a small detail brush to paint letters on one flat side of each block. For straight, even letters, trace a stencil onto the block first—you can print free alphabet stencils online, or use a vinyl stencil you can stick to the block and paint through. If you’re feeling fancy, you can use a wood burner (called pyrography) to etch letters directly into the wood. That’s my personal favorite because it’s super durable—once burned, the letter is part of the wood, not just on top. It does take a little practice to not mess up the lines, though. If you’re not confident in your freehand skills, use a stencil guide for the burner.
Wait, what about numbers and symbols? A lot of people mix that up, but if you’re making alphabet blocks for little ones, stick to one letter per block, plus maybe a few common shapes (circle, square, triangle) to keep it interesting. Don’t cram a, b, c on the same block—kids get confused. And make sure each letter is uppercase and lowercase? No, wait—for toddlers, uppercase first, then add lowercase later if it’s for older kids. Uppercase is bigger, easier to recognize, and less overwhelming.
Once the letters are on, you need to seal them so they last. This is another step you can’t skip. If you leave the ink or paint exposed, it will scratch off when a block gets banged against a table or chewed on. Use a food-safe, non-toxic sealant. I always recommend water-based polyurethane or beeswax polish. Beeswax is super easy to apply—just rub a thin layer over the entire block with a cloth, let it sit for 10 minutes, then buff off the excess. It gives a nice, matte finish and smells like honey, which is a bonus. Polyurethane is more durable for really rough play—just make sure it’s water-based, not oil-based, because oil-based has fumes and takes longer to dry. Apply two thin coats, sand lightly with 220-grit between coats, and wipe off all dust before the next coat. Don’t use spray sealant, by the way—it’s too messy, can get into the letter lines, and is harder to control.
Now, safety checks. This is huge when it’s for kids. First, make sure all edges are rounded. Even if you sanded them, a sharp corner can scratch a kid’s face. I use a small rotary tool with a sanding attachment to round the corners just a little, or you can use a corner rounder tool that’s made for wood. Second, test for non-toxicity. All the paint, ink, sealant you use should be labeled “non-toxic” and “CPSA compliant”—that’s the standard for children’s products in the US. If you’re buying supplies, double-check the label; some cheap brands cut corners on safety. Third, do a choke test. For kids under 3, make sure the block can’t fit into a standard choke tube (you can find those online for cheap). If it’s too small, make your blocks 2 inches square instead.
Wait, what if you want to make them more unique? A lot of customers ask about paint colors. Soft pastels are popular for nursery decor, or bright primary colors for playrooms. But if you want to keep it simple, natural wood with just the burned letters is super sleek and works for any space. You can also add little patterns on the other sides of the blocks—dots, stripes, animals—to make them more fun. I’ve even had customers add their kids’ names on one block as a personal touch.
Now, common mistakes to avoid. Let’s list those, because I’ve seen them all. First, not sanding enough. If the block is rough, the paint will flake off. Second, using cheap paint or ink. I once had a customer use regular acrylic craft paint and within two weeks, all the letters were gone. Third, skipping the sealant. Same problem—no sealant means no durability. Fourth, making the blocks too small. I had a customer who made 1-inch blocks and had a kid almost choke on one. Fifth, not rounding edges. A sharp corner can cause a small cut, which is a hassle.
If you’re buying blocks from a supplier (that’s me, by the way) instead of cutting them yourself, here’s what to ask for. Ask for solid hardwood blanks, no knots, sanded smooth. Ask for blocks that are at least 1.5 inches square. If you want pre-stained or pre-cut blocks, make sure they’re non-toxic. I always tell my customers to order extra—you’re going to drop some, lose some, and mess up a few while painting. It’s better to have a backup than to run out halfway.
How to use the blocks once they’re done? Just a little tip: for toddlers, use them to teach the alphabet, count, and even simple words. For older kids, you can use them for spelling games, or even as a fun decor piece on a bookshelf. They’re not just for playing—they’re a keepsake, too. I’ve had customers who made blocks for their kid’s first birthday, and now they’re using them for their second kid.
Wait, let’s wrap up with a quick recap so you don’t forget anything: 1. Pick solid hardwood blocks, 1.5+ inches square. 2. Sand until super smooth, dust completely. 3. Add letters with non-toxic, durable paint or wood burning. 4. Seal with food-safe beeswax or water-based polyurethane. 5. Round edges, do a choke test, make sure all supplies are non-toxic. That’s it. It’s a 5-step process, and it takes about an hour per dozen blocks if you’re working at a normal pace. No fancy skills needed, just a little time.
If you’re a school, a toy maker, or someone who wants to order bulk wooden blocks to make your own alphabet sets, hit me up. I can help you pick the right lumber, sizes, and supplies, and even give you tips on bulk ordering to save money. No pressure, just here to help.
Wooden Puzzles References:
- Consumer Product Safety Commission (CPSC). (2023). Safety standards for children’s wooden toys. U.S. Government Publishing Office.
- American Wood Council. (2022). Recommended wood types for children’s educational products. National Wood Flooring Association.
- Toy Industry Association. (2021). Guidelines for durable children’s alphabet toys. Toy Association International.
- National Small Business Association. (2023). Tips for sourcing safe wooden craft supplies for small-scale production. Small Business Administration.
- The Woodworker’s Journal. (2022). Pyrography techniques for durable wood lettering on craft items. F&W Media.
Yiwu Hoye Crafts Co., Ltd.
As one of the most professional wooden blocks manufacturers and suppliers in China, we also support customized service. Please feel free to wholesale high quality wooden blocks for sale here and get pricelist from our factory. For price consultation, contact us.
Address: Room 402, Building 2, Wanti Plaza, Yiwu City, Zhejiang Province, China
E-mail: jennifer@hoye-crafts.com
WebSite: https://www.chinawoodentoyfactory.com/
