Hey there, I’m Jake, and for the past seven years, I’ve been selling stainless steel cabinets to restaurants, home renovators, and small business owners across the country. Most days, I get calls from folks who picked up one of our stainless steel cabinets because they loved its durability for a commercial kitchen or its modern low-maintenance vibe for a home remodel—but they’re stuck on installing the countertop. Stainless steel isn’t like laminate or quartz, and it’s way different from the old butcher block most people know. I’ve installed my fair share of countertops alongside my team, and I’ve watched customers mess up the process because they tried to wing it with generic tools. Today, I’m walking you through a step-by-step guide that works with our stainless steel cabinets specifically—no confusing third-party hacks, no wasted materials, just what I’ve learned from helping hundreds of folks get this right. Stainless Steel Cabinet

Before we even touch a drill or a level, let’s talk about prep. This is the part that trips most people up, and it’s the reason some countertops end up wobbly or have uneven seams. First, pull out the cabinet units we shipped to you. If you bought a full set, like a 10-foot run for a restaurant line or a kitchen renovation, lay all the cabinets on the floor right where they’ll sit. Don’t leave them in the boxes yet—you need to check how they line up. Every one of our stainless steel cabinets has precision-cut legs with adjustable feet, so that’s your first tool. Grab a small level, the kind you can carry in your pocket, and set it along the front edge of each cabinet. Most floors aren’t perfectly straight, so you’ll need to twist those feet to bring each cabinet up or down until the front edge is dead level. If you don’t do this, your countertop will have a dip in the middle, and water or food debris will pool there—bad news for any space, whether it’s a home kitchen or a busy deli.
Next, measure your base. I know it sounds simple, but when we cut our stainless steel countertops at the factory, we account for a 1/8-inch overhang on each side for easy installation. If you measure wrong, you’ll either have to cut the countertop (which isn’t hard, but it’s not ideal) or have a gap between the cabinet edge and the wall that’s too big. For multiple cabinets, measure from the very left edge of the first cabinet to the very right edge of the last one, then add 1/4 inch total for overhang (1/8 per side). Write that number down twice—once on a scrap of paper you don’t lose, and once on the inside of a cabinet door so you don’t forget mid-install. If you’re installing a countertop over an island, same rule: add that 1/4 inch to your total measurement to make sure you have enough space for the sink, stove, or other fixtures you’ll cut later.
Once your cabinets are level and measured, it’s time to prep the countertop surface itself. If you bought a solid, pre-cut stainless steel slab, skip this part for now. But if you have multiple sections (like a run that’s 12 feet long, which wouldn’t fit on a single slab), you’ll need to work on the seams. Our countertops come with pre-milled edges, so the seams are as straight as can be, but you still need to clean both mating surfaces. I use rubbing alcohol and a lint-free microfiber cloth—no paper towels, they leave little fibers that can mess up the bond. Wipe the underside of each section where they’ll meet, then let it dry for 2 minutes. If there’s any dust or grease there, the epoxy won’t hold, and you’ll have a loose seam that leaks or looks uneven.
Now, here’s the part no one tells you: cabinet strength is non-negotiable. Stainless steel countertops are heavy. A 10-foot solid slab is about 150 pounds—more than a big fridge. So if your cabinets are flimsy, the countertop will sag, especially under a heavy sink or a commercial mixer. That’s why our stainless steel cabinets are built with 16-gauge steel frames, but if you added any extra accessories like a trash pullout or a spice rack, make sure those are secured tight before you set the countertop down. I always recommend adding temporary 2×4 braces underneath the cabinets if you have a long run—they don’t take long to screw in, and they keep the cabinets from shifting while you lift the counter.
With prep done, it’s time for the install itself. First, have a buddy help you lift the countertop—do not try to do this alone. I’ve seen people strain their backs trying to hoist a 100-pound slab by themselves, and that’s not worth it. Our countertops have lifted edges on the sides, so grab those, not the thin front edge. Lift it straight, not at an angle, and set it gently on the cabinets. Once it’s sitting on the top edges, step back and check two things: first, the overhang is even on all sides. If one side hangs an extra half inch, use a pry bar to nudge it into place before you secure anything. Second, the seams line up perfectly between sections. If there’s a gap bigger than a credit card, lift the counter back off and adjust the cabinets a bit—small gaps get bigger when you tighten the brackets.
Now, securing the countertop to the cabinets. Most people grab random screws, but our stainless steel cabinets come with pre-drilled pilot holes on the top rear and side of each unit, exactly where you need to attach the countertop. Use the 1-inch hex-head screws we include with every countertop kit—don’t use longer screws, they’ll poke through the bottom of the cabinet and scratch your floor. For each cabinet, drive two screws: one near the back corner, one near the front corner, on the inside side of the cabinet. Tighten them until they’re snug, but don’t overdo it—over-tightening can strip the metal or bend the cabinet frame. If you’re working with a stainless steel sink, that’s also the time to install it now, before you finish the seams. Most sinks drop right into a pre-cut hole in the countertop, and the mounting clips that come with the sink will hold it tight to the stainless steel surface.
Seams are next—this is where the professional look comes from. If you have multiple countertop sections, you can’t just leave them apart. Our seam epoxy is specifically formulated for stainless steel, not the generic stuff for granite or quartz. It’s thin, so it seeps into gaps, and it polishes to match the countertop so you can barely see where the two sections meet. Here’s how to do it right: apply a thin bead of epoxy along both mating edges of the countertop sections, then press them together. Wipe away any excess epoxy that squeezes out with a damp cloth right away—once it dries, it’s impossible to remove. Let the epoxy cure for 24 hours before you do anything else on the countertop, like install fixtures or set heavy items on it. I learned this the hard way once when I had a customer who walked on the countertop an hour after sealing seams, and he had a noticeable gap that we had to redo.
Once the seams are cured, it’s time to do the final level check. Grab your level again, set it along the front edge and the back edge of the countertop. If there’s a dip, go back to the adjustable cabinet feet and tweak them a little until it’s perfectly level. For extra stability, you can add a caulk bead along the back edge where the countertop meets the wall. Use a silicone caulk that’s rated for stainless steel and moisture, not the old acrylic stuff that cracks. This stops water from getting behind the countertop and causing mold, especially in kitchen spaces that get a lot of splashes.
Now, let’s talk about common mistakes I see all the time, because I want you to avoid them. First, don’t use wood filler or generic putty on stainless steel. The metal expands and contracts with temperature changes, and wood filler will crack or fall out. Our cabinets and countertops are made to handle that, so leave the putty for other materials. Second, don’t rush the level step. I’ve had customers finish their entire install in an afternoon because they were excited, and then a month later they call saying water is pooling on the countertop. That’s a level issue, and it’s way harder to fix once the countertop is sealed. Third, don’t skip cleaning the seam surfaces before you apply epoxy. Even a small smudge of grease from your hands will weaken the bond, and you’ll have a loose seam before you know it.
At the end of the day, installing a stainless steel countertop with our cabinets is about being precise, not fancy. We design our cabinets to work seamlessly with our countertops, so you don’t have to guess about measurements or pilot holes. Whether you’re a home renovator doing your first kitchen or a restaurant owner outfitting a new line, this process works every time. If you run into a snag—whether it’s measuring wrong, leveling issues, or something I didn’t cover here—our team is here to help. We don’t just sell you stainless steel cabinets; we walk with you through every step, from install to maintenance. If you’re ready to get started, reach out to our team to talk about your project, whether it’s a small home kitchen or a full commercial kitchen build. We can send you custom measurements, extra hardware, or even a video call walkthrough if that’s easier for you. No pressure, no sales pitch—just honest help from the people who build these cabinets day in and day out.
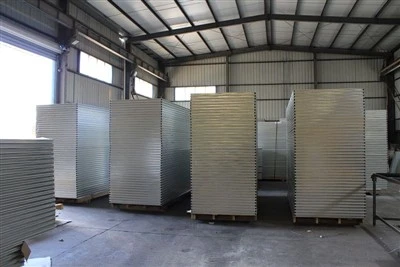
Color Steel Sandwich Panel Now, go grab your level and your buddy, and don’t forget to take your time. The best stainless steel countertops aren’t the ones that go up fastest—they’re the ones that last for decades, because you took the time to do it right.
References
- National Kitchen & Bath Association. (2022). Stainless Steel Countertop Installation Best Practices. NKBA Industry Guidelines.
- American Society of Mechanical Engineers. (2021). Material Properties for Stainless Steel Cabinetry & Countertops. ASME Technical Publication.
- Stainless Steel Fabricators Association. (2020). Seam Bonding and Finishing for Commercial Stainless Surfaces. SSFA Installation Manual.
Suzhou Jinye Air Purification Steel Structure Co., Ltd.
As one of the most professional stainless steel cabinet manufacturers and suppliers in China, we offer a wide range of products with superior quality. Please feel free to wholesale durable stainless steel cabinet for sale here from our factory.
Address: No. 858 Jinsheng Road, Jinjiaba Town, Wujiang District, Suzhou City, Jiangsu Province, China
E-mail: 18913057067@163.com
WebSite: https://www.suzhoujinye.com/
